Thursday, December 13, 2012

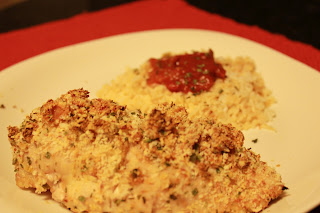
Cornmeal Halibut with Corn Salsa

Last year for Christmas I gave Steve a cookbook that is spin off product from the Men's Health magazine called "Cook This, Not That" and since he unwrapped it we have been cooking our way through the book. Some of the notable dishes we have made from it are:
One of the recipes that we had been eying up for some time now was that 'Cornmeal Catfish with Corn Salsa'. And as you can see from the title of this post, we chose to use halibut instead of catfish.

Here are all of the ingredients that you will need for this recipe:
  • 4 tsp canola oil
  • 1 ear corn, kernels removed from the cob (we just used a can of corn kernels)
  • 1 can (16oz) black beans, rinsed and drained
  • 1 avocado, pitted and cut into cubes
  • juice of one lime (plus wedges for garnish - optional)
  • 1 jalapeno, minced
  • salt and black pepper
  • 1 cup cornmeal
  • 1/8 tsp cayenne pepper
  • 4 catfish fillets (we just used 2 halibut fillets) 6oz each
And here is how we brought it all together:
  1.  Heat 1 teaspoon of the oil in a medium saucepan over medium-high heat. Add the corn kernels and cook, stirring occasionally, until they are lightly browned, about 5 minutes. Add the beans and warm through. Transfer to a bowl and stir in the avocado, lime juice, and jalapeno; season with salt and pepper.
  2. Pour the cornmeal onto a large plate; season with the cayenne, 1 teaspoon salt and 1/4 teaspoon black pepper. Dredge the fillets in the cornmeal until evenly coated.
  3. Heat the remaining 3 teaspoons of oil in a large nonstick skillet or saute pan over medium heat. When the oil is hot, add the catfish (or in our case the halibut) and cook for 4 to 5 minutes per side, until the coating is golden and crispy and the fish flakes easily. Serve the fish topped with the salsa along with additional lime wedges, if you like.
This dish was very tasty! It was our fish time using cornmeal as a coating and we loved the texture and added flavor it gave to the recipe. The salsa made a lot more than we had imagined but luckily it was so good and was used in many other dishes over the next few days.

Give this recipe a try when you are looking for a good crunchy fish dish with a Mexican flare!

Bon appetite & enjoy!

This recipe is from:
Cook This, Not That! - Kitchen Survival Guide
The No-Diet Weight Loss Solution
David Zinczenko & Matt Goulding
Rodale Inc. 2010
Page 244

Tuesday, December 11, 2012

Homestyle Chicken & Rice Soup

Over the past few months I have been trying out various soup and stew recipes. One that I have been keen to try to a chicken soup. So the other week I was looking through our cupboards and trying to decide what to make for supper. I noticed that we had lots of rice and chicken and decided that I would finally try to make my own chicken soup (with rice!).

I needed a recipe fast so I went straight to the Ben's website and looked for a chicken and rice soup recipe - and luckily they had one. I quickly scanned through the recipe and confirmed that I would be able to make this dish (looking back I wish I would have looked a little closer at how much the recipe would make - Steve and I ended up eating the leftovers for days!).

To view all of the ingredients for the recipe and how to bring it all together, visit the Uncle Ben's website and if the recipe does not instantly come up just search for 'Homestyle Chicken & Rice Soup'.

The soup was great when I ate it right away; however, when I came back to it a little while later to put the leftovers in the fridge I noticed that all of the broth was gone and I basically just had rice with chicken and vegetables (and lots of it!). So to counteract this, anytime Steve and I wanted to eat some of the leftovers we would just add a little bit of water and chicken broth and turn it back into soup.

I'll need to find another recipe (or some kitchen tricks) to help make a soup with rice in it better for the next time. If you have suggestions on how to avoid this kitchen flaw please let me know!

Friday, December 7, 2012

Creamy Chicken Florentine

If you haven't noticed yet, many of our weeknight recipes are chicken (and many are in creamy sauces!). So keeping with that trend Steve and I tried our hands at a new creamy chicken recipe - this time a Florentine.

Steve found the recipe on the Kraft Foods / Kraft Canada website. When Steve first looked over the recipe he thought that we would not need to adjust it at all, but when I took a look at it I suggested we swap out the spinach for broccoli (I am not a big spinach fan). And I was happy to see that even the website recommends that as a possible substitute!

Here are the ingredients that you will need for this recipe:
  •  3 cups penne pasta, uncooked 
  •  1 Tbsp. oil
  •  1 lb. (450 g) boneless skinless chicken breasts, cut into strips 
  •  1 orange pepper, cut into strips 
  •  4 cups tightly packed baby spinach leaves 
  •  1 tub (270 g) Philadelphia Herb & Garlic Cooking Creme
  •   2 Tbsp. toasted pine nuts
And if you want to do the same thing we did (swap the spinach for brocolli) the website recommends this variation:

  • Substitute 2 cups small broccoli florets for the peppers and spinach, adding the broccoli to the cooking water for the last 2 min. of the pasta cooking time.
We chose to keep the peppers in though - we both love peppers!

Here is how Kraft Foods / Kraft Canada suggests you bring it all together:
  1. Cook pasta as directed on package, omitting salt. 
  2. Meanwhile, heat oil in large nonstick skillet on medium-high heat. Add chicken; cook and stir 5 to 7 min. or until done. Stir in peppers and spinach; cook 2 min., stirring frequently. Add Cooking Creme; cook and stir 2 to 3 min. or until heated through. 
  3. Drain pasta, reserving 1/3 cup cooking water. Gradually add reserved water to sauce mixture until desired consistency is reached. Add pasta; mix lightly. Top with pine nuts. Serve immediately.

This was a very easy recipe and I loved the added crunch and flavor that the toasted pine nuts added. I am sure that we will be adding this to our regular recipe rotation.

Give this recipe a try when you need a mix up your regular weeknight chicken dish.

Bon appetite & enjoy!
 

Tuesday, December 4, 2012

Pomegranate Jewel Cake


Photo Credit: Lisa Buchanan
Almost every Tuesday at United Way the lovely ladies on our annual campaign team coordinate bringing a cake or a tasty bakery goody to the office for us all to enjoy. Sometimes they are homemade and sometimes they are store bought.

A few weeks ago one of the members of our team, Lisa, made a Pomegranate Jewel Cake and brought it in for all of us to enjoy. The recipe below was passed onto my from Lisa and the photos are hers as well. This was definitely a tasty treat! Bon appetite & enjoy!

Pomegranate Jewel Cake
(Nigella Lawson, Feast) [Comments in square brackets are Lisa’s]

For the cake:
  • 8 eggs (separated)
  • 300g ground almonds
  • 1 pinch salt
  • 300g caster sugar [1.5 cups] [Remember: this is a weight measure converted to volume, so it will be different if you use regular granulated sugar.  Caster sugar (not to be confused with icing sugar) is easy to find; Redpath calls it "Instant Dissolving Sugar"]
  • zest 1 lemon
  • zest 1 orange
To finish:
  • 2 pomegranates [or 1 pomegranate + ½ cup pomegranate juice]
  1. Preheat the oven to gas mark 4/180C [350F].  Grease and line a 23cm spring form pan.
  2. Separate the eggs, putting the white into a large grease-free bowl, and the yolks into a separate bowl.  Whisk the egg whites with a pinch of salt until they are stiff but not dry and then whisk in 100g of sugar before putting them to one side. 
  3. Add the remaining 200g sugar and zest to the yolks and beat until the mixture is light and dry, then beat in the ground almonds.  This will be very thick and heavy, so lighten it with a good dollop of whisked egg whites before folding the rest of them into the mortar-thick, yellow almond mixture: it is easiest to fold in the remaining egg whites in thirds.  You need to work firmly, but gently, so everything is well combined without the mixture losing its air. 
  4. Pour into the lined and greased tin and bake for about 40 minutes, though check at 30 as you don't want this to scorch.  If the cake is brown enough, while still gooey in the middle, loosely cover with a sheet of foil. 
  5. As soon as the cake comes out of the oven, juice one of the pomegranates [or use 1/2 cup bottled pomegranate juice; juicing those suckers is messy business] and pour the juice over the cake while it is still hot and in its tin.  Let the cake cool and absorb the pomegranate juice and leave until cold before unspringing from the tin.  Place the cake on a stand or plate, and then cut the other pomegranate in half and bash out the seeds over the cake [again, the bashing is messy, so I do my usual tidy seeding method and sprinkle the seeds over the cake.] 
Photo Credit: Lisa Buchanan

Sunday, December 2, 2012

Fettuccine Alfredo

Now that we are into the colder fall months (and nearing the freezing winter months) I enjoy creamy comfort foods even more. And it is always a plus that Steve loves Fettuccine Alfredo!

In the beginning of November, Steve and I were looking through the Cook with Campbell's website and came across their recipe for Fettuccine Alfredo - so naturally we had to try it.

The recipe is very simple and only has a few ingredients - always a good thing for us when we are coming home late from work and have only a little bit of time to make a tasty supper.

Here are the ingredients that their website suggests:
  • 9 oz (255 g) fettuccine
  • 1/4 cup (60 mL) white wine
  • 1/2 tsp (2mL) cracked black pepper
  • 1 carton (480 mL) Cambell's Stock First Cream stock
  • 1 tsp (5mL) fresh parsley, chopped
  • 1/4 cup (60mL) grated Parmesan cheese
And here is how they suggest you bring it all together:
  1. Cook fettuccine according to instructions on box, set aside.
  2. Simmer wine and cracked black pepper in a medium size saucepan over medium-high heat until reduced by half.
  3. Add stock and simmer for 4-5 minutes.
  4. Add cooked and drain noodles, chopped parsley and Parmesan cheese and stir to coat noodles completely.
  5. Serve in a warm serving bowl or on pasta plates.
This was a very tasty dish and did serve very well with white wine (given that you need wine for the recipe, you may as well have the rest while you're eating your labour of love!). We chose to use Avondale Sky's Bin 17 - a great Nova Scotian white wine!

To see this recipe online visit the Cook with Campell's site.

Bon appetite & enjoy!

Thursday, November 15, 2012

Warm Delicious Gingerbread

Chunky Beef Noodle Soup + Bin 45
A few weeks ago on a Sunday evening, after making the Chunky Beef Noodle Soup for the second time (still very delicious!) with an equally delicious bottle of Bin 45 from Avondale Sky winery, we decided to try our hand at making gingerbread (neither one of us had made it before).

The recipe we chose was from the 'Grandma's Best Recipes - Traditional comfort food just like Grandma used to make' book. This was the first time that we were trying a recipe from this book and it was a great first success!

Here are the ingredients that the cookbook calls for:
  •  3-3/4 cups all-purpose flour
  • 1 tbsp baking powder
  • 1 tsp baking soda
  • 1 tbsp ground ginger
  • 3/4 cup unsalted butter
  • 3/4 cup brown sugar
  • 3/4 cup molasses
  • 3/4 cup maple syrup or corn syrup
  • 1 egg, beaten
  • 1 cup milk

And here is how the cookbook recommends that you bring all of those ingredients together:
  1.  Line a 9 inch / 23 cm square cake pan, 2 inches / 5 cm deep, with wax or parchment paper
  2. Preheat the oven to 325 F / 160 C
  3. Sift the flour, baking powder, baking soda, and ground ginger into a large mixing bowl
  4. Place the butter, brown sugar, molasses and maple syrup in a medium saucepan and heat over low heat until the butter had melted and the sugar has dissolved. Set aside to cool briefly
  5. Mix the beaten egg with the milk and add to the cooled syrup mixture
  6. Add the liquid ingredients to the dry ingredients and beat well using a wooden spoon until the mixture is smooth and glossy
  7. Pour the mixture into the prepared pan and bake in the center of the oven for 1-1/2 hours until well risen and just firm to the touch. This makes a lovely sticky gingerbread, but if you like a firmer cake cook for an additional 15 minutes
  8. Remove the from oven and allow the cake to cool in the pan on a wire rack. When cooled, remove the cake from the pan with the wax paper. To store, wrap tin foil and place in an airtight container for up to one week to allow the flavors to develop
  9. Cut into wedges and serve as an afternoon snack or with cream for dessert. Drizzling some warmed maple syrup on the top is an added extravagance
And the 'Grandma's Tip' that is shared is:
  • A very moist gingerbread is a delight. It can be made even better by mixing in 2 ounces / 55 grams of chopped preserved ginger just before turning the batter into the pan

This recipe was perfect and delicious! It did make a whole cake pan full though - so we were able to share with it friends and family. This is a recipe that I think I will try again near the holidays.

Give this one a try when you're looking for a dessert or snack that will give you that 'warm hug'.

Bon appetite and enjoy!

Recipe is from:
Grandma's Best Recipes
Parragon Books Ltd. - UK. 2007
Gingerbread, Page 194

Monday, November 12, 2012

Simple Pepper Slicing Practice

I love learning new techniques and tricks to improve my cooking skills (and of course to speed up certain tasks in the kitchen). One of the tasks in the kitchen that I find is tedious, but I do enjoy, is cutting/chopping/dicing/slicing vegetables.

The other day I was watching the Food Network when I heard that the host would be showing a great tip on how to quickly chop up a green pepper - so of course I was intrigued and my eyes were glued to the screen. And of course it was a great tip!

Here are the steps:

1. Cut the 'top' and 'bottom' off of your green pepper
2. Stand the pepper on one end and cut the pepper down one side


3. Slide the knife along the inside of the pepper to remove the seeds and core


4. Cut the pepper in half or smaller more manageable sections
5. Cut pepper into julienne slices and then cut bunches of julienne slices (dice)


I also found this handy YouTube video of the whole process as well (as soon as I finished typing up my notes of course!).

If you are not already preparing your green peppers this way I suggest you give it a try - it works every time!

Bon appetite and enjoy!

Sunday, October 28, 2012

Mini-Salmon Cakes

As you have probably come to understand, I like to get my recipes from a variety of sources - but I do like to try ones from local publications such as the Inspired magazine that I can pick up at my Sobeys. I also like to browse through the NSLC's Occasions magazine from time to time, but this was the first time I actually wanted to roll up my sleeves and try one of their recipes.

A few days ago Steve and I decided that we would try out the mini-salmon cakes recipes. When we looked through the recipe we noticed that it was not too complicated but it would take a bit of time (there is a two hour block of time where the salmon cakes must be placed in the refrigerator before you can continue to the next step). So we decided to give it a try and to open a delicious bottle of wine to help with the 'waiting'.

Here are the ingredients that you will need for this recipes:
  • 2 tbsp olive oil
  • 1/2 cup mayonnaise
  • 1 1/2 cups red pepper, very finely chopped
  • 1/2 cup white onion, finely chopped
  • 1 lb skinless, boneless salmon fillets, chopped
  • 2 2/3 cups bread crumbs
  • 1/4 cup chopped fresh chives
  • 2 tbsp chopped fresh basil
  • 6 tbsp all-purpose flour
  • 3 large eggs, whisked
And here is how you will bring it all together:
  1.  Heat two tablespoons of olive oil in a large saute pan over medium-low heat. Add the onion and peppers and saute until peppers are soft. Let cool.
  2.  In a large bowl, combine the salmon, chives, basil 2/3 cup bread crumbs, mayonnaise and sauteed onions and peppers; mix thoroughly. Season with salt and pepper.
  3. Measure out 1/6 cup portions of salmon mixture. Roll into a ball and place on a baking sheet. Refrigerate for two hours.
  4. In separate bowls, place remaining bread crumbs, flour and eggs. Dip salmon cakes in the flour, the dip into egg mixture and finally into the bread crumbs. Flatten the salmon balls o they become one-inch diameter discs.
  5. Heat remaining olive oil in large saute pan.
  6. When the oil is hot, add the salmon cakes. When the cakes are golden brown, flip and cook on the other side. Cook in batches until complete.
This dish is absolutely amazing! I am a modest person, but I felt that this dish was delicious enough to be served in some of Halifax's best restaurants. I cannot wait to make it again!

To add to this tasty dish Steve and I decided to make a delicious dill sauce (we usually make this just when we are having salmon for supper). Here are the ingredients and recipe for the dill sauce:
  • 1/2 cup light sour cream
  • 2 tablespoons pure maple syrup
  • 1 tablespoon Dijon mustard
  • 1 tablespoon lemon juice
  • 1 tablespoon minced fresh dill
  • 1 teaspoon grated lemon zest
  • 1/2 teaspoon each salt and pepper
  1. In a small bowl, whisk together sour cream, maple syrup, mustard, lemon juice, dill, lemon zest and salt and pepper. Serve cold.
I should also share the the wine we chose to pair the mini-salmon cakes with was from Luckett Vineyards. In early October Steve and I visited six wineries in Nova Scotia's valley (i.e. wine country) and picked up lots of new wines to try. One of our favorite new wineries was Luckett Vineyards - we were even lucky enough to have Pete Luckett himself do our wine tasting! The wine that we paired with this dish was Luckett's 2011 Ortega - Pete himself told us it would be great with seafood and he was definitely right in his suggestion!

Give this one a try when you have some extra time on your hands, or need to impress family and friends that are coming over for dinner.

Bon appetite and enjoy!

Thursday, October 25, 2012

Lemon-Caper Chicken, Potato & Asparagus Skillet

If you haven't noticed yet - I appear to be cooking my way through the Inspired Magazine recipes. Simply because they are timely and delicious! And it doesn't hurt that I now feel part of their team through sharing these recipes back to them on twitter (@InspiredRecipes - Inspired Magazine; @CourtneyLarkin - me).

I was intrigued to try this recipe because I am big fan of lemon potatoes and have enjoyed capers in the past. Prior to trying this recipe I had only ever had capers on smoked salmon, on top of cream cheese on a baguette - but I knew I liked it then so I thought I may like it just as much (if not more) in this dish. The only thing I knew I would not like is the asparagus (I simply do not like it) but luckily Steve does and so I knew I could push mine over to his plate and enjoy more of the lemon potatoes.

The recipe was very easy to make - the only adjustments to the recipe that we made was to use boneless, skinless chicken breast (instead of bone in chicken thighs) and cut the pieces of chicken into smaller bite size chunks (about the same size as the potatoes).

I was very impressed by how much of an impact the lemon zest had the the dish. Now that I know how important it is to a recipe and how much flavor it can add I am going to try to seek out similar recipes to try.

I would definitely try this recipe again and encourage you to consider adding it to your recipe book as well! Click here for the complete list of ingredients and recipe.

Bon appetite and enjoy!

Monday, October 22, 2012

Southwest Chicken Bake over Rice


Steve and I always stock up on chicken at Sobeys whenever it goes on sale (and we only shop at Sobeys so we are like hawks when it actually does go on sale). So from time to time we will end up with lots of chicken in our freezer and will look for new recipes to use it all up.

I have mentioned in previous blog posts (from months ago) that I really enjoy both the Kraft and Campbells websites for coming up with meal ideas, and both are great at providing me with new chicken recipes too. This time I stumbled upon a recipe from Kraft and thought I would give it a try (also because Steve has just come to realize he loves corn and black beans in anything - so I thought that I would use that to my advantage).

We chose to use the Southwest Chicken Bake as a 'topping' for the rice. And this lead to us having this for leftovers for days and days. The good thing about this recipe for us was that was very similar to the taste (minus to turkey meatballs) of the Slow Cooker Turkey Meatball Chili.

This was a very quick and easy recipe and makes lots of great leftovers (easy to heat up and eat again at work the next day). Give this one a try when you have a busy week but needs several good filling meals.

Click here for the full list of ingredients and the complete recipe. 

Bon appetite and enjoy!

Saturday, October 20, 2012

Quick & Crunchy Mac & Cheese

I usually find that by Thursday night I need a quick meal idea that is going to somehow involve cheese (one of my all time favorite comfort foods). So I was so happy to come across this recipe on the French's website.

Early in the week Steve and I had remade a recipe from back in April (green bean casserole made for Easter dinner) and still had some of the French's fried onions left over (these were not left over from April - but from earlier in the week). So I started to go through the French's site to see if there was anything else that I would like that I could use them for. I eventually stumbled upon this recipe and thought I should give it a try.

The recipe was simple and delicious - exactly what I was looking for. And the fried onions gave it that extra little kick I was looking for. The recipe makes a very cheesy meal - so make sure that you are in a cheesy mood when you try it.

For the complete recipe click here.

Bon appetite and enjoy!

Wednesday, October 17, 2012

Pepperoni Pizza Rolls

I came across this recipe one night while I was going through pages of recipes on Pinterest. It was a few days before Steve and I were expecting a little visitor (who happens to be 7 and loves pizza) so I thought I should bookmark the recipe and try it while the visitor was here with us.

On the Saturday night of the visit, after a long day of swimming at the Canada Games Centre, we came back to the house, rolled up our sleeves, put on our aprons and started to make our pizza rolls. The recipe was surprisingly easy (easy enough for a little visitor to help us) and was delicious. We chose to have two types of pizza rolls (1) pepperoni from Fox Hill Cheese which was a little bit spicier - ideal for the adults (2) normal pepperoni that was not spicy at all.

It was a fun little recipe to try and made tons and tons of pizza rolls (enough for 3 people to eat enough to be full at supper and then enough for 3 people to be full the next day at lunch).

I would consider making this recipe again, but perhaps switching up the ingredients depending on my mood (and what is in the fridge).

To check out this recipe please click here.
(I have to give complete credit for this recipe to Six Sisters' Stuff who did the original post and then put it on Pinterest).

Sunday, October 14, 2012

Slow Cooker Turkey Meatball Chili

Another great find from the Sobeys Inspired magazine! This time from their fall publication.

As we have slowly started to move away from the hot summer days where we would barbeque hamburgers and hotdogs almost every day, we have been craving hearty meals that are still easy to make. That's why we were so excited when we came across this recipe.

We followed the recipe to a tee except for two steps - instead of using a slow cooker (we work longer than 8 hour days so the slow cooker was not an option on the night that we wanted to make it) we chose to just use a large pot and make it directly on the stove. And we opted to not use a can of peaches and cream corn - we just used a can of corn.

I was very impressed at the taste of the turkey meatballs - I had never had them before so I was a little skeptical but they were excellent.

Overall this recipe was simple yet hearty and full of flavour. Both Steve and I were surprised at how much we enjoyed the recipe - so needless to say this one will definitely be added to our 'must make again' list.

Give this one a try the next time you've had a long day, it's raining outside, and you need a good warm hug (from food!).

Click here for the full list of ingredients and the complete recipe.

Bon appetite & enjoy!

Friday, October 12, 2012

Sushi Attempt #2 - Califiornia Rolls

You may remember that back in April Steve and I attempted to make sushi for the first time (if you don't remember click here for that post). Since that time we have made sushi again, but we always kept it the same type - just using salmon.

During our trip to California this past July we had the opportunity to enjoy the most delicious sushi at Loews Santa Monica (absolutely stunning hotel and delicious foods). We were at Loews for their Live From Loews events that happened monthly and were fortunate that one of them just happened to be during our trip. While we were at Loews we had the opportunity to taste every dish, enjoy every cocktail/wine/beer/champagne and enjoy the great band. One of the great items on the menu was sushi that was being made on the spot - however, I was a little nervous to try it because it was being made with nori (the thin black paper like product in many sushi rolls) and not the clear/white soy paper I usually prefer. So with it being vacation and all, Steve and I both decided to try something new. We loaded up our plates with their California rolls, found a great seat by the band, raised our glasses in a toast to our amazing trip and dove in. We each took a few seconds to take in the tastes and textures and soon both of us had the goofiest sushi filled mouth grins imaginable - we loved it! I loved it so much I went back to the sushi table probably five more times before the end of our night.

So as you can see, we have grown to love California rolls and the nori paper; and because of this we decided that the next small step that we could take for making sushi at home would be to make the California roll (but still use the soy paper - we have tons of it!). Now our California rolls were not as good as Loews, but we were still very proud of our work.

If you are ever in Santa Monica you have to go to Loews and try their sushi and if you don't like sushi, you just need to go into the hotel and look around - it is stunning!

Try making your own sushi rolls at home - and if you have tips and tricks to making your own please share them with us - we're eager to perfect our techniques.

Bon appetit & enjoy!

Tuesday, October 9, 2012

Chicken with Crunchy Salsa Topping & Salsa Rice

Well the summer is now over and we are well into our fall routine. We've been very busy with work, alumni/homecoming activities, Steve's new company (At Home Rehab), and of course Thanksgiving. So we are just now getting back into making time to post recipes and pictures from our favorite recipes (and there are lots of posts that need to be made!).

Over the summer months we really started to enjoy looking through the magazines that are published by stores that we go to (i.e. Sobeys, NSLC, etc). And it was to my surprise that I really enjoy the Inspired magazine that Sobeys puts out on a quarterly basis. You'll notice that the recipes in this post are both out of the Inspired - Spring magazine and several posts that will be following this one will also be from that publication. If you haven't grabbed a copy of the magazine for yourself yet (it is usually available on magazine racks as you exit Sobeys) I encourage you to pick one up next time you are in, or just go visit their website.

The Chicken with Salsa Topping & Salsa rice recipes were made by myself and Steve in early September and were delicious. Since that time we have made variations of the salsa rice multiple times (it is a really simply recipe that allows you to add in great flavors and vegetables that you may not be able to find ways to incorporate into your regular weeknight meals). We have not yet made the chicken recipe again - but it is on our list of 'must make again!'.

To view the recipes for the Chicken with Crunchy Salsa Topping and the Salsa Rice click here and go to page 9.

I hope that you will try this recipe and enjoy it as much as Steve and I have.

Bon appetit & enjoy!


Monday, August 13, 2012

Maple Dijon Pork Chops

I love the taste of maple and I love a perfectly cooked pork chop!

The other week Steve was responsible for seeking out new recipes for us to try and after finding the Juicy Grilled Burgers recipe, he thought that he would continue to look on the Campbells recipe for other great ideas - that was when he stumbled across their recipe for Maple Dijon Pork Chops.

After reading through the list of ingredients and the steps to make the dish we both agreed that we would have to give it a try - the only thing that was different for us was adding an apple into the sauce - but we were up for a change. There was only a slight change to the recipe that we made which was that we substituted the can of cream of celery for a can of cream of broccoli - this was only because we already had a can of cream of broccoli in our kitchen.

This recipe was delicious and we both liked the way the sauce brought together the crisp crunch of the apples and the sweet, creamy combination of the maple and cream of broccoli.

This was a very quick meal to make and we have already added it to our list of recipes to try again soon! And now that we have made two successful dishes from the Campbells website I am sure we will continue to look there again.

Bon appetit & enjoy!

Thursday, August 9, 2012

Juicy Grilled Burgers

Once Steve and I arrived back from our vacation (and dealt with the reality of a home without palm trees and hotel staff waiting on our every need) we decided it was time to get back to our old ways and get back to the kitchen (or in this case the grill).

The hot summer weather has made us want to focus more on easy to make BBQ dishes (things that do not require us to keep the oven on). With this focus in mind, we came across a Campbell's soup recipe for Juicy Grilled Burgers. The recipe seemed very simple and the only ingredient that was a little different than anything we had tried before was adding tomato soup to the ground beef mixture.

There are only a few ingredients and only a small amount of prep time required to get the beef patties ready for the BBQ. And the end result was that they were delicious! The tomato soup added a great creamy taste to the burgers - we both agreed that we would definitely make these burgers again. And going forward I would also look into using the excess tomato soup as a sauce for the burgers as well.

Definitely give this recipe a try the next time you are looking to make your own burgers!

NOTE - I didn't have time to take a picture of this dish because as soon as they were ready we both ate them and forgot to take a picture (which I would suggest is proof of how good they really were!). Luckily, Sobeys included a mention to the recipe in their local flyer this week!

Bon appetit & enjoy!

Monday, August 6, 2012

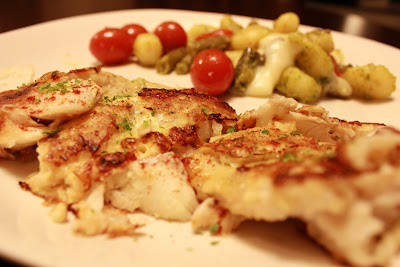
Pan Fried Haddock

We're back from vacation and taking time to get caught up on our blog (in between enjoying nice weather, the occasional mimosa, and visiting family). Since the summer began we both noticed that we have not been trying as many recipes as we were during the winter months - mostly because we are barbecuing quite a bit and trying previously posted recipes - but we will continue to post anything new that we try (there just may not be as many posts as there were when we first started).

Back in July, before we went on our trip to California, Steve and I made pan friend haddock and pesto gnocchi (we previously made the pesto gnocchi in May and posted it on the blog on May 29, 2012).

We found the pan fried haddock recipe on the Canadian Living website. We check out their recipes every now and again - mostly just after I have watched an episode of Best Recipes Ever.

The pan fried haddock recipe was very simple to follow and we both liked that it had a little extra kick by having the paprika in it. This was also the first time that we made a pan fried haddock (we have breaded and fried chicken before, but not haddock).

For the complete list of ingredients and the recipe click here to go directly to the Canadian Living website.

Bon appetit & enjoy!

Sunday, July 15, 2012

We've Sprouted!


It has been about 2 months since my last post about our herb garden. Over the last month we moved the plants out to the balcony to get lots of sunlight and the odd rain shower and since then they have grown significantly.

We have been cutting off some of the dill to put in our eggs (each day for Steve and just on the weekends of me); and just last night we pulled off lot of basil and made our own pesto!

Steve and I are heading to California for about two weeks for vacation, but when we come back we are looking forward to cutting off some of the chives and thyme and using that in recipes as well.

We're so pleased with the results of our first herb garden and are looking forward to growing more herbs next year too.

Bon apetit & enjoy!


Sunday, June 24, 2012

Chunky Beef Noodle Soup

It was a rainy weekend in Halifax two weeks ago and Steve and I felt that we needed a good hearty meal for our Sunday night supper (this was even after we had spent the afternoon at Greek Fest and tried all of those delicious dishes!). We flipped through our cook books, magazines, and favorite recipe websites and finally agreed to make a soup from the Taste of Home -Winning Recipes cookbook.

Steve and I had never made soup before, but we felt that after stuffing chicken and making our own sushi, we could probably handle a soup. We read over the ingredients and were happy to learn that we already had all of the ingredients in our kitchen and wouldn't have to make a special trip to the grocery store (I think everyone enjoys those 'small wins' in life when things just work out really easily and don't require any extra steps).


Here are the ingredients that we used:
  • 1 pound of boneless round steak, cut into 1/2 inch cubes
  • 1 medium onion, chopped
  • 2 garlic cloves, minced
  • 1 tablespoon vegetable oil,
  • 2 cups water
  • 1 can (14-1/2 ounces) diced tomatoes, undrained
    • We used two tomatoes
  • 1 can (10-1/2 ounces) condensed beef consomme, undiluted
  •  1-2 teaspoons chili powder
  • 1 teaspoon salt
  • 1/2 teaspoon dried oregano
  • 1 cup uncooked spiral pasta
    • We used penne
  • 1 medium green pepper, chopped
  • 1/2 cup minced fresh parsley
And here is how we brought it all together:
  1. In a large saucepan, cook the round steak, onion and garlic in oil until the meat is browned and the onion is tender, about 5 minutes.
  2. Stir in water, tomatoes, consomme, and seasonings; bring to a boil.
  3.  Reduce heat; cover and simmer for 1-1/2 hours and until meat is tender.
  4. Stir in pasta and green peppers.
  5. Simmer, uncovered, until noodles are tender, about 8 minutes.
  6. Add parsley.
    This recipe makes about 8 servings.

We loved this soup! It was so easy but was exactly what we were looking for - tasty and hearty. Because it made 8 servings we were able to enjoy it for a few days too - always an added benefit of a large dish that you really like.

Next time there is a rainy weekend I recommend you give this recipe a try - hopefully we will have great weather in Halifax this summer and you won't need to try it for a few months.

Bon appetit & enjoy!

This recipe is from:
Taste of Home - Winning Recipes / Reader's Digest Book
Reiman Media Group Inc. 2010
Soups & Chili
Chunky Beef Noodle Soup
Page 83

Saturday, June 23, 2012

Chicken Sliders

It's been awhile since my last post but believe me - Steve and I have still been busy in the kitchen, just not as diligent in writing the posts.

About two weeks ago, Steve and I decided to finally make sliders at home - we both love getting them when we go out to eat, but never actually made them at home. We had already recently picked up a copy of Sobey's Inspired magazine which had a few suggestions on Sobey's own sliders (salmon, beef, and chicken).

Steve and I picked up a box of the chicken sliders, Sensations by Compliments Mini Ciabatta buns, cucumbers and tomatoes.

NOTE - Steve and I rarely make supper from a box like this - but we wanted to give these a try before we went the route of making our own chicken sliders.

I took care of slicing our vegetables and Steve took to the BBQ to get our chicken sliders ready.

We were both really impressed with the Sobeys brand chicken sliders and will definitely be trying them again many times of the summer months.

If you're looking for a really quick meal idea, pick up a box of the chicken sliders and a bag of the ciabatta buns on your way home from work - it will be delicious!

Bon appetit & enjoy!

Tuesday, June 5, 2012

Curried Pork & Cheddar Hot Dogs


As I mentioned in a post earlier this week, Steve and I tried a few recipes from the 'All You Need is Cheese' recipe magazine. We really enjoyed the Mozzarella Pasta with Chicken, Alfredo -Style, so we were encouraged to keep on our quest for trying new cheese infused recipes. The next recipe that we decided to try was the Curried Pork & Cheddar Hot Dogs.

My friends, family and co-workers will know that I love hot dogs - just plain old simple hot dogs - for some strange reason they are a great comfort food for me and I just love them (in New English style hot dog buns and lots of ketchup!) The only thing better is a Fenway Frank or two!

So to say the least - I was really eager to try this recipe simply because it was referred to as a hot dog. But other than the simple name familiarity, I was eager to try to recipe because it involved pork and curry - two other things I really enjoy. I was working some very long hours over the last week - so Steve was the lead chef in our house and took the lead in making this recipe (I did nothing for this one).

For the complete list of ingredients and the recipe please visit the 'All You Need is Cheese' website.

Steve shared with me that this recipe was very easy to make. The only adjustment that he made to the recipe was that he left out the raisins - as neither one of us case much for those. We also chose to have different 'toppings' than the lettuce and tomato that the recipe suggested. Steve also decided to make some in the shape of hot dogs and some in the shape of hamburgers - allowing for us to simply use all of the remaining buns that we had in the house.

This recipe got that thumbs up from both Steve and I. The flavour of the 'hot dogs' were a nice variation from the traditional hot dog and/or hamburger. We will definitely be making this recipe again!

Bon appetit & enjoy!

Monday, June 4, 2012

Mozzarella Pasta with Chicken, Alfredo-Style

 Last week Steve and I received the 'All You Need is Cheese' magazine that was full of great recipes - so we decided to use recipes from the magazine for all of our supper-time meals last week. The first one that we decided to try was the Mozzarella Pasta with Chicken, Alfredo Style - mostly because we already had some fresh mozzarella left over from the Pesto Gnocchi we made the week before.

The recipe was really easy to make and was delicious and we only made a small adjustment to the original recipe- we choose not to cook the ingredients in the papillote.

Here are all of the ingredients that you will need for the recipe:
  •   5 cups (1.25 l) short pasta, cooked 
  •   1 cup (250 ml) store-bought Alfredo sauce
  •  1 tbsp (15 ml) store-bought pesto - we choose to add 3 tbsp because we really enjoy pesto
  • 1/4 cup (60 ml) sun-dried tomatoes, chopped
  • 2 cups (500 ml) grilled chicken, cut into strips
  • 3 cups (750 ml) vegetables, your choice - we chose to use zucchini and broccoli
  • 1 1/2 cups (375 ml) Canadian Mozzarella, diced
  • Pepper
This recipe was really easy to bring together, here are the steps that we followed (which differ from the steps provided on the recipe link above):
  1. Add cooking spray to a frying pan or skillet and heat the chicken over a medium heat until cooked thoroughly. Once the chicken is cooking throughout, remove from the skillet of frying pan and cut into chunks. Keep chicken warm until it is time to add it to the rest of the dish.
  2. Wash and chop all of the vegetables that you choose to use. Place the vegetables in a saucepan and cook over a low-medium heat. Once the vegetables start to loose their crisp texture, add in the Alfredo sauce and pesto.
  3. Once the vegetable/sauce has started to heat up, add the chicken chunks. Allow the vegetable-sauce-chicken mixture to simmer for about 5 minutes. Remove from heat and separate into 4-6 equal servings.
  4. Dice the fresh mozzarella and add to the top of each serving. Adding the mozzarella at the end allows for it to melt over all the other ingredients. You can also leave some of the mozzarella on the side and let your dinner guests add as much or as little as they would like - depending on how cheesy they are feeling.
This recipe was excellent and it was another great recipe with mozzarella - a cheese that both Steve and I really enjoy. It was a great recipe to start in the 'All You Need is Cheese' magazine - give this one a try!

Bon appetit & enjoy!

Tuesday, May 29, 2012

Pesto Gnocchi with Green Beans & Tomatoes


For Friday night's dinner Steve and I decided to try a new dish alongside a favorite of ours - RIBS! Steve makes a mean rack of ribs - so he takes care of creating his secret sauce, slow cooking them and then grilling them on the BBQ. To balance all of the meat we were about to consume we choose to try to different take on the average salad - pesto gnocchi with green beans and tomatoes.

This is a super simple recipe - only a few ingredients and only a few steps (the perfect combination for a weeknight meal). Here are the ingredients that you will need:
  • 1 tablespoon olive oil
  • 2 cans green beans (you can also use fresh green beans - I just prefer the canned ones)
  • 1 pint cherry tomatoes
  • salt
  • 1 package (16 oz) potato gnocchi
  • 1/2 cup pesto
  • 1 cup bite size cubes of fresh mozzarella
  • Freshly grated parmesan
And here is how you will bring it all together:
  1. Set a large pot of water over high heat. Heat a large skillet or saute pan over medium heat. Add the olive oil and green beans to the skillet and cook for 3 minutes, then toss in the tomatoes and continuing to cook until the green beans are tender (but still crisp) and the tomatoes are browned on the outside. Remove from the heat.
  2. Salt the water after it reaches a boil. Drop the gnocchi in and cook until they float to the surface (4 to 5 minutes). Drain and add the gnocchi to the pan with the green beans and tomatoes. Stir in the pesto and mozzarella. 
  3. Sprinkle grated parmesan over each serving.
This recipe was very easy and depending on how much you like pesto - you can either add more or less to match your desired taste. Give this one a try when you are looking to try something different from the average salad or side for a rack of ribs.

Bon appetit & enjoy!

This recipe is from:
Cook This, Not That! - Kitchen Survival Guide
The No-Diet Weight Loss Solution
David Zinczenko & Matt Goulding
Rodale Inc. 2010
Page 210

Monday, May 28, 2012

Mediterranean Couscous Salad


As you probably know, Steve and I try to attend the Halifax Club's monthly cooking classes - and the last one we went to a few weeks ago was the Greek cooking class. We had a great time and we had the opportunity to make the Mediterranean Couscous salad at the class. The dish turned out really well at the class, so we decided to make it this past week. The recipe we were provided with from the cooking class was meant to serve 8 people and we choose to keep the recipe as it was provided to us - because we loved it so much we knew we could (and would) want to each enough for 8 people.

Here are the ingredients that you will need:
  • 2 cups instant couscous
  • 2 cups boiling water
  • 1/5 cups extra virgin olive oil
  • 2 cups small zucchini cubes
  • 2 cups small eggplant cubes
  • 2 cloves garlic, peeled and finely chopped
  • 1 large roasted red pepper, peeled, seeded, diced
  • 1 English cucumber, seeded and finely cubed
  • 1 cup pitted kalamata olives
  • 7 ounces of Greek feta cheese, crumbled
  • 3 tablespoons of finely chopped Italian parsley
  • 3 tablespoons of finely chopped mint
  • 1/2 cup red wine vinegar
  • Pinch of salt and pepper
And here is how you bring it all together:
  1. Put the couscous in a heat proof bowl, pour the boiling water over it, stir with fork and cover the bowl with plastic wrap. Set the bowl aside until needed - the couscous must be left for a minimum of 5 minutes.
  2. Heat 2 tablespoons of extra virgin olive oil in a heavy saute pan over medium-high heat. When hot add zucchini/eggplant and season. Saute for several minuted or until the vegetables are starting to become tender. Add the garlic and saute for another 30 seconds. Remove the vegetables from the pan to a baking sheet and spread out to cool quickly.
  3. Uncover the couscous and dump into a large bowl. Using fork, break the couscous grain up. Add zucchini, eggplant, roasted red pepper (see the 'Roasted Red Pepper & Feta Stuffed Chicken' recipe for how to roast red peppers), English cucumber, olives, feta cheese and herbs then toss.
  4. Pour the red wine vinegar into a small bowl and slowly whisk in the extra virgin olive oil. Season to taste and pour the dressing over the salad. Toss the salad with the dressing and season to taste prior to serving.
NOTE - The salad is best served just after it is made, ingredients can be prepared in advance but the salad should be assembled at the last minute.

This recipe took more time than our usual weeknight meals - simply because of the process to roast the red pepper and to chop up all of the veggies. But the work was worth it! The couscous salad was delicious! We are so glad we went to the cooking class and now have a new recipe to incorporate into our cooking practice.

We choose to eat the couscous salad with kebabs done on the BBQ - great combination!

Definitely give this recipe a try! Or consider joining Steve and I at one of the upcoming Halifax Club cooking classes - we'd love for you to join us!

Bon appetit & enjoy!

Sunday, May 27, 2012

Chicken in Basil Cream


Steve and I stocked up on chicken the other week when it was on sale and so we had a few chicken dishes over the past week. We had made this recipe - Chicken in Basil Cream - before but somehow it never made it to the blog. This is a very easy recipe - the only time consuming part is waiting for the sauce to thicken to the desired consistency (but if you are like me and Steve it is easy to pass that time while you review the activities of your day - just remember to give the sauce a stir every now and again).

Here are the ingredients that you will need for this recipe:
  • 1/4 cup milk
  • 1/4 cup dry bread crumbs
  • 4 boneless skinless chicken breast halves (we used 2 because ours were very large)
  • 3 tablespoons butter
  • 1/2 cup chicken broth (I just use a whole can of Campbells' chicken broth)
  • 1 cup heavy whipping cream
  • 1 jar (4 ounces) sliced pimientos, drained - optional (we do not use them)
  • 1/2 cup grated parmesan cheese
  • 1/4 cup minced fresh basil
  • 1/8 teaspoon pepper
And here is how you will bring it all together:
  1. Place milk and bread crumbs in separate shallow bowls. Dip chicken in milk, then coat with crumbs.
  2. In a skillet over medium-high heat, cook chicken in butter on both sides until juices run clear, about 10 minutes. Remove and keep warm.
  3. Add broth to skillet. Bring to boil over medium heat; stir to loosen browned bits.
  4. Stir in the cream and pimientos; boil and stir for 1 minute. Reduce heat.
  5. Add parmesan cheese, basil and pepper; cook and stir until heated through.
  6. Pour over the chicken.
This recipe is very simple and delicious - just like we aim for in all of our recipes! I had never had a basil cream before we tried this recipe at our home - but once we tried it once we have made sure to make it many more times.

If you are looking for a new sauce to add to your chicken (and you like breaded chicken - honestly, who doesn't!) I encourage you to try this recipe!

Bon appetit & enjoy!

The recipe is from:
Taste of Home - Winning Recipes / Reader's Digest Book
Reiman Media Group Inc. 2010
Breakfast & Brunch
Chicken in Basil Cream
Page 229

Saturday, May 26, 2012

Roasted Red Pepper & Feta Stuffed Chicken


Just writing the title of this dish makes me want to eat it. A few months ago Steve and I tried our hand at a stuffed chicken breast dish - and it didn't go quite as well as we had hoped (we couldn't seem to get the chicken to look presentable once it was all stuffed). However, we thought that we shouldn't give up on stuffed chicken recipes and decided to give it another try.

We had read a few recipes and had developed a few thoughts on what we wanted to include in our recipe - we decided to make roasted red peppers, use feta cheese, and mix it all together with a healthy dose of balsamic vinaigrette.

Here are all of the ingredients that we used:
  • 2 chicken breasts
  • 2 red peppers
  • 1.5 cups of feta cheese
  • 1/2 cup of balsamic vinaigrette
  • 1 tablespoon dried basil
  • 3 tablespoons of olive oil
  • Pepper to taste
  • 10 toothpicks
  • Cooking spray
And here is how we brought it all together:
  1. Cover a baking pan with tin foil and then grease the foiled pan with cooking spray; use cooking spray to cover all sides of each red pepper; place red peppers on the baking sheet in the oven on broil - leave in oven until the red peppers have blackened
  2. Remove blackened red peppers from the oven; place in a metal bowl and cover bowl tightly with saran wrap. Let sit for approximately 10 minutes
  3. Remove the cooled blackened red peppers from the metal bowl and begin to remove their skin; discard red pepper skin and remove the seeds from the inside of the peppers; cut the red peppers into small cubes and place into a bowl (this bowl will be used to mix all of your 'stuffing')
  4. Add feta cheese (break apart with fork), balsamic vinaigrette and basil to the red peppers (in the bowl mentioned above; mix the ingredients together (add pepper to taste if preferred)
  5. Place each chicken breast on a surface that is well lined with either waxed paper or saran wrap; then cover the chicken with the wrap that you used on the surface
  6. Use a blunt object (meat tenderizer, rolling pin, or if you are me - a can of green beans) and tenderize each chicken breast until it is the perfect thickness to still allow to keep its form, but thin enough to allow for lots of stuffing to be added
  7. Add the stuffing mix to each flattened chicken breast - filling so that the breast will be full but not overstuffed - you need to remember that these need to close; begin pulling the sides of the chicken breast together and closing with toothpicks (take your time with this step - it may take a few tries to get your breast to close). You can also leave some of the mixture out and place it over top of the stuffed chicken breasts when they are finished cooking
  8. Place each stuffed chicken breast in a baking dish and brush olive oil over each one; place in oven and cook for 375F for 25 minutes
  9. Remove cooked stuffed chicken breasts from the oven (check to ensure they are done) and enjoy!
This recipe was excellent - and we didn't follow a set recipe (this was a rare occasion). We really enjoyed roasting the red peppers (despite us setting off our smoke detector several times) and we were so pleased with how the chicken looked at the end and tasted. We are definitely going to make this recipe again and will soon start to look at what other combinations we can use to stuff our chicken with. This recipe is one we both loved and highly recommend!

Bon appetit & enjoy!

Tuesday, May 22, 2012

Our Herb Garden is Growing!

It has been just over 2 weeks since Steve and I rolled up our sleeves and planted our own herb garden. We planted dill, basil, chives and thyme in one planter; and rosemary in its own planter. We are happy to share that all 5 herbs have started to grow - some much faster and taller than others, but that is just how nature intended it to be.

Here are a few pictures of their progress:

This is where our herb garden currently resides.
Week 1 - Everything is sprouting!
Herb order (front to back):
Thyme, Chives, Basil, Dill

Week 2 - They're really growing now!
Week 2 - Even the Rosemary has started to grow!
This herb was the last to sprout.

Monday, May 21, 2012

Grilled Steak with Red Wine Butter

Since Steve and I have bought our BBQ and furnished our patio we have been trying to barbecue as much as possible. One of the recipes that we had found a few months ago, and were waiting to try, was this Grilled Steak with Red Wine Butter recipe - found in the 'Cook This, Not That! - Kitchen Survival Guide' book that Steve and I have used many times (and referenced many times) for this blog.
The recipe was very easy to make and allowed us to try something new - we had never made our own flavored butter before and were eager to try it - it was very simple and added so much to the recipe.

Here are the ingredients you will need:
  • 1 cup dry red wine
  • 1 shallot mined
  • 4 tablespoons butter, softened
  • 1 teaspoon fresh rosemary
  • black pepper to taste
  • salt to taste
  • 2 strip loin steaks

And here is how you will bring it all together:
  1. Combine the wine and shallot in a small saucepan and simmer over medium heat until reduced to about 2 tablespoons (it will have a thick, syrupy consistency)
  2. let the red wine syrup cool, this stir in the softened butter with the rosemary and a few cracks of black pepper. Once fully incorporated, spoon the butter onto a large piece of plastic wrap. Fold the wrap over the butter and twist the ends to create a log of red wine butter. Place in the fridge until ready to use.
  3. Preheat a stove top grill pan. Season the steaks with salt and pepper and cook until medium-rare. Remove the steaks and slice a coin of butter over the top of each.


This was a great steak recipe and we are going to use the red wine butter again, and probably try our hand at a few other flavored butters too. Give this one a try next time you are firing up the grill!

Bon appetit & enjoy!


This recipe is from:
Cook This, Not That! - Kitchen Survival Guide
The No-Diet Weight Loss Solution
David Zinczenko & Matt Goulding
Rodale Inc. 2010
Page 29

Tuesday, May 15, 2012

Ridiculously Good Honey Garlic Ribs

On Friday Steve decided it had been one of those weeks that we just needed to finish off with a great BBQ - and what better way than to make ribs! I have to admit that Steve was the sole chef on this kitchen creation and so I invited him to write the recipe for this blog post (the rest of this post is Steve's):

First I created a sauce with some ingredients that were laying around the house.

1 bottle of Heinz Garlic BBQ sauce
About 1/4 to 1/3 of a cup of honey
About 2 table spoons of brown sugar

I mixed all of these into a bowl and added more honey or brown sugar to taste.

I then put the ribs into the slow cooker frozen, ideally should have been thawed, and poured in the sauce mixture along with 3 cloves of garlic and a bit of water to make sure if didn't burn. The sauce didn't completely cover the ribs so I cooked them meat side down and with the membrane on the back of the ribs intact. I set the slow cooker on high for 4 hours. After about 3 hours the ribs looked like they had cooked a bit quickly so I reduced the heat to low for the remaining hour. I would recommend cooking the ribs on low for a longer period of time (6-8 hours) if possible.

Once the ribs were done in the slow cooker I took them out and removed the membrane on the underside of the ribs. If you just slide a knife along the underside you'll notice there is a thicker membrane, which if left on can leave the ribs tough, but just take the time to remove it completely.

I preheated the BBQ to about 300 deg and when the ribs were ready to put on I turned the heat down to low-medium. I then drained the sauce from the slow cooker into a bowl and basted the ribs with the remaining sauce while on the BBQ. I cooked the ribs for total of about 10 minutes per side but flipped every 5 minutes, basting with more sauce on each flip.


***
Courtney here again.
Steve's recipe turned out amazing and the ribs were so delicious - I can't wait to have these again. Give Steve's ribs recipe a try next time you go to BBQ.

Bon appetit & enjoy!


Wednesday, May 9, 2012

Starting Our Own Herb Garden

Since Steve and I have moved into our new place, we have talked about how we would one day like to have a herb garden that we could incorporate into our cooking routine. During the winter months it was easy to talk about getting the herb garden ready, but not actually acting on it. However, once April came we decided we needed to start putting our talk into action.

Given that we do not yet have a yard of our own, we knew that our herb garden would probably start inside our home and then eventually work its way out to our patio. We also knew that we wanted to grow a few different herbs and would need enough space on our patio to accommodate the planter. I took some time and measured the true size of our patio, determined the location of all of our patio furniture/BBQ/etc and then determined how much size could truly be allocated to a good size planter (that could fit 4-5 herbs). Once I had the very basic blueprint laid out I showed it to Steve and we agreed that we now had a plan for our soon-to-be herb garden.

Steve and I spent the rest of April actually becoming more interested in buying the patio furniture and BBQ than we were in the herb garden, and before we knew it, we had everything bought and on the patio - except for the herb garden. So finally this past weekend I made it my #1 priority to go out and buy everything I could imagine we would need for our little patio garden. My mission took my directly to Canadian Tire where I was able to pick up everything I needed (planter, 3 bags of soil - I did overestimate how much I would need, gardening tools, and of course our seeds). I decided to buy 5 types of herb seeds: dill, rosemary, basil, chives, and thyme. And as my co-workers will know, I did have a slight mishap when leaving Canadian Tire and ended up having the cart full of gardening supplies (including very heavy bags of soil) come crashing down on me right in the parking lot (very painful and very embarrassing). Luckily a few very nice Canadian Tire shoppers helped me right up and helped me get everything into my trunk. And then I was set to head home and begin setting up our little garden.

Steve and I had a great time getting everything ready (I really enjoyed it because after my little accident I had to stay on the couch with ice on my leg and was able to 'direct' the entire gardening process!). We decided to plant the rosemary in a different container because we had read that it can grow similar to mint and try to take over other herbs (a trouble maker!).

So for right now our herb garden lives just inside our patio windows where it can receive lots of sun and some protection for the 'harsh' Nova Scotia spring elements. Once we feel our little garden is ready we will move it out onto the patio - but for now we are very protective new herb garden parents. Which is strange, because we also can't wait to use the herbs in our cooking creations - not what you'd want to hear a new parent say about their new addition...

That point is neither here nor there, but we will make sure to post pictures once the herbs start to grow and will keep the blog updated on their progress.