Wednesday, February 20, 2013

Nifty Gifty!

For Christmas I was the very happy receiver of one of this year's hottest gifts - the Corkcicle!
It is the perfect gift for anyone who enjoys a bottle of white wine every now and again (which of course I do!).

If you have a wine lover in your life - you need to get them a Corkcicle for a special occasion (birthday, Valentines Day, anniversary, Christmas, etc) this year!

Enjoy!

Monday, February 18, 2013

Moroccan Salmon with Quinoa Pilaf

As we were finishing up 2012 and preparing for 2013, Steve and I were trying to move out of the turkey and chocolate coma we had been in and into a more healthy diet. So it was quite fitting that we started to look through the two new cookbooks that Steve received for Christmas. You may remember that last year for Christmas I had given Steve a cookbook called 'Cook This Not That' and it was from/connected to Men's Health Magazine. That one cookbook was used for many recipes in our home over the last year, so naturally when I saw that there were two more of these books at Chapters I had to pick them up!

In an effort to eat healthy, Steve and I decided to try something new - quinoa. Over the past few months I had heard lots of people talk about this great grain, so I figured that we should give it a shot.
The recipe we settled on was 'Moroccan Salmon with Quinoa Pilaf' (from the orange Cook This Not That 'Easy & Awesome 250-Calorie Meals' cookbook)

Here are all the ingredients that you'll need for this recipe

1 cup quinoa
1 1/4 cup chicken stock or more if needed
1/2 cup parsley
1/4 cup golden raisins (didn't use)
2 tbsp pine nuts toasted in a pan or oven for a few minutes
1 tsp salt
1/2 tsp black pepper
1/4 tsp cumin
1/8 tsp cinnamon
1/8 tsp cayenne
4 skinless salmon fillets (4-6 oz each)

Here is how we brought it all together:
  1. Preheat the oven to 350 deg F. Prepare quinoa according to package instructions, using chicken stock instead of water. Stir in the parsley, raisins, and pine nuts. Cover and keep warm.
  2.  Combine salt , black pepper, cumin, cayenne, and cinnamon and rub over salmon fillets. Place on baking sheet and bake until the fish flakes with gentler pressure from your finger, about 10-12 minutes, depending on the thickness.
  3. Serve each salmon fillet with a generous scoop of quinoa pilaf.
Steve and I LOVED this recipe! It was a delicious new take on salmon and the quinoa was a perfect side! I liked the nutty flavor of the quinoa and actually chose to add some lemon juice to mine as well - it gave it a little added kick!

You should definitely give this recipe a try - I know that we will be adding it to our short list of recipes to try to again!

Bon appetite & enjoy!

Friday, February 15, 2013

Have a Merry Morning! Bacon, Eggs & Hash Brown Cups

This year was the first year that Steve and I spent Christmas (eve, morning and day) together! And given that this would be the first of many, we wanted to create some of our own traditions - including a delicious Christmas morning breakfast. I had been looking through lots of food blogs, websites and magazines when I finally came across the perfect recipe for us in the Inspired Magazine: Bacon, Eggs and Hash Brown Cups.

For us this was the perfect recipe because it allowed us to only make as many as we would want - many Christmas morning breakfast recipes would serve 6-8 people and although we do love food, we knew that a dish that large would go to waste.

I have been very impressed with the recipes that we had tried to date from the Inspired Magazine so I felt comfortable marking this as our go-to Christmas morning tradition breakfast (no pressure!).

Here are all of the ingredients that you will need for this recipe:

Ramekins (we used three - 2 for Steve and 1 for me)
1 tablespoon melted butter
3 cups Compliments Hash Brown Fried Potatoes (thawed)
3 green onions, thinly sliced
2 Compliments Large Eggs, whites only, whisked
1/4 teaspoon salt and pepper (each)


Filling
6 slices Compliments Naturally Smoked Bacon
1 small red pepper, finely chopped
1/2 cup shredded Sensations by Compliments Aged 5 Years Canadian Cheddar Cheese
6 Compliments Large Eggs
1/4 teaspoon salt and pepper (each)

 And here is how you will bring it all together:


I also appreciated that the online recipe for this dish suggests some tips to help with the preparation:
  • Make ahead: Prepare steps 1 and 2 the night before, cover and refrigerate. Bring cups to room temperature before proceeding with step 3.
This dish was amazing and was the perfect Christmas morning breakfast! We are looking forward to making it for many more Christmases to come!


Give this recipe a try anytime you have a special occasion - it would also be great for brunch!


Bon appetite & enjoy!

Monday, February 11, 2013

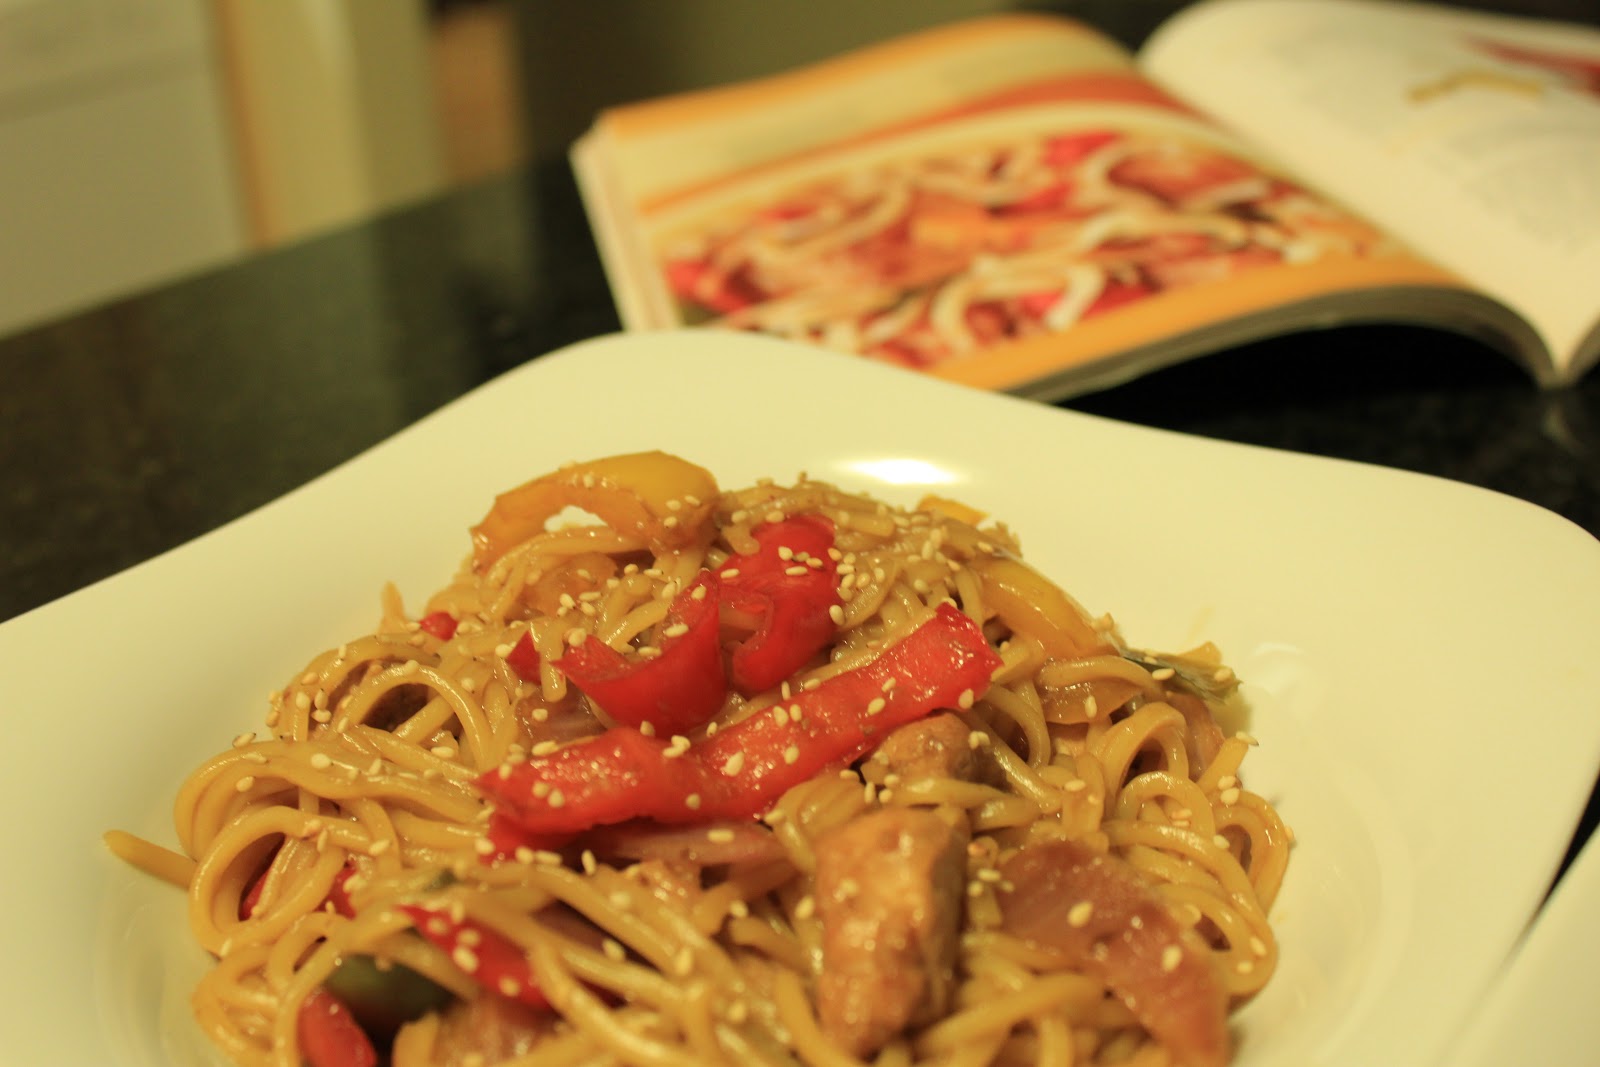
Oriental Pork & Vegetables

Over the holidays Steve and I spent some time setting up our new home office, which included putting all of our cookbooks and cooking magazines away on our new bookshelves. While we will putting everything away, we noticed that there were several cookbooks which we had not used in awhile and decided to take another look through them for new recipe ideas. It was in the 'Better Homes and Gardens: every meal easy' cookbook that we found the 'Oriental Pork & Vegetable' recipe.

The recipe itself was very simple, just as the name of the book would suggest; but in my opinion it lacked flavor and was a little too boring for my style of cooking. There was nothing new or exciting about this recipe - but it is indeed easy.

Here are the ingredients that you will need for this recipe:

6 ounces rice stick noodles or two 3 ounce packages ramen noodles (any flavor)
2 teaspoons sesame oil or olive oil
1 16 ounce package frozen stir fry vegetables (we used fresh peppers)
1 12 ounce pork tenderloin, cut into 1/4 inch thick slices
1/4 cup teriyaki sauce
2 tablespoons plum sauce

And here is how you will bring it all together:
  1. Discard spice packet from ramen noodles, if using, or save for another use. Prepare noodles as directed on package. Set aside and keep warm.
  2. Heat a very large nonstick skillet over medium-high heat. Add 1 teaspoon of the sesame oil. Cook and stir vegetables for 4-6 minutes or until crisp and tender. Remove from skillet. Set aside and keep warm.
  3. Add remaining oil to skillet. Add pork and cook over medium-high heat for 4-6 minutes or until no longer pink, turning slices once. Stir in vegetables (drained if necessary), teriyaki sauce and plum sauce; heat through. Toss with noodles. Makes four servings. 
I would only suggest that you try this recipe if you are looking for a very very very easy recipe to try and you only have a very small amount of time. There is some flavour in the recipe - but I suggest that you add in some additional spices to kick it up a notch.

Bon appetite & enjoy!

Friday, February 8, 2013

Beef & Bulgur Pitas

Through the evolution of our food blog and our desire to expand our tastes, Steve and I have tried many new foods, that we most likely would not have if it were not for this blog. And I am glad to say that we have now both tried bulgur and are very glad that we did!

As you may know, Steve and I are big fans of the show 'Best Recipes Ever' on CBC. Back in December we were watching the show when a recipe for 'Beef and Bulgur Pitas' came on. We had both heard of bulgur before, but had never tried it. We were intrigued by the recipe because the show's host assured those watching that it was a simple recipe and a great way to introduce a new grain to our diet - so naturally we had to try it! So we bookmarked the recipe online and then added it to our weekly supper list.

We were not as impressed with the recipe as we had hoped we would be. But we did think that it was lacking in sauce. At the time we added sour cream (that is the sauce that you will see in the photos) to help with this problem but it just did not quite fix the issue. So I am glad to see that the online ingredients and recipe for this dish now include a yogurt sauce - I think that that would have made a huge difference for us. And will now lead us to try this recipe (now modified) again!

One of the handy tips that I did learn from the show's host was how to reinforce your pita - you just cut off the top third off each pita and then place it inside each bottom of the pita! This is great advice for this recipe and all future pita recipes!

Here are all of the ingredients that you will need for this recipe:

1/2 cup (125 mL) bulgur, medium or coarse
8 oz (227 g) extra-lean ground beef
1 carrot, grated
1 zucchini, grated
1 onion, chopped
2 cloves garlic, minced
1 tbsp (15 mL) chili powder
1 tsp (5 mL) ground cumin
1/4 tsp (1 mL) pepper
1 cup (250 mL) no-salt-added tomato juice
1/2 cup (125 mL) fresh coriander or parsley, chopped
2 tsp (10 mL) lime juice
4 whole wheat pita pockets
4 leaves leaf lettuce
16 slices English cucumber
16 cherry tomatoes, halved
1/4 cup (60 mL) low-fat plain yogurt

And here is how you will bring it all together:
  1. In saucepan, bring 3/4 cup (175 mL) water to boil; stir in bulgur. Reduce heat to low; cover and simmer until no liquid remains, about 10 minutes.
  2.  Meanwhile, in nonstick skillet, sauté beef over medium-high heat, breaking up with spoon, until no longer pink, about 5 minutes. Drain off any fat from pan.
  3. Add carrot, zucchini, onion, garlic, chili powder, cumin and pepper; cook over medium heat, stirring occasionally, until onion is tender, about 5 minutes. Add tomato juice and bring to boil; reduce heat and simmer until liquid is almost evaporated, about 5 minutes. Stir in bulgur, 1/4 cup (50 mL) of the coriander and lime juice.
  4. Cut top third off each pita; place inside each bottom. Line each with lettuce leaf and some of the cucumber. Spoon in beef mixture; top with tomatoes, remaining cucumber, yogurt and remaining coriander.
This is a recipe that we are going to definitely try again - and we encourage you to try it too!
We will also be looking for lots of other bulgur recipes, given that we have lots and lots of bulgur left!

Bon appetite & enjoy!

Monday, February 4, 2013

Turkey Breast Stuffed with Curry & Gouda

Leading into Christmas and the holidays (which now feels like forever ago), Steve and I wanted to try a few turkey recipes that were more than just the traditional Christmas dinner way to prepare turkey. So it was perfect timing when we came across a recipe in the 'All You Need is Cheese' magazine that gets delivered every few months to our home.

The recipe, Turkey Breast Stuffed with Curry and Gouda, peeked our interest because neither one of us had ever prepared a turkey breast - only chicken breasts. But we were up for the challenge - especially because the recipe included curry and gouda - two things we both love!

I enjoy flipping through the 'All You Need is Cheese' magazine and then looking at the recipes online because of the helpful videos and for the nutritional information breakdown. Now that Steve and I are almost one year into the blog and have really developed a deep passion for cooking - we both appreciate any helpful hints and tips we can pick up along the way!

The recipe itself was not too difficult. We were both surprised at how large one turkey breast was!It fed us for days! And the only change that we made to the recipe was that we did not make the cranberry sauce - simply because we are not big cranberry fans. I was however, slightly disappointed that the end product was not juicer, it was actually quite dry - but there was lots of flavour!

Here are all of the ingredients that you will need for this recipe:

1 tbsp (15 ml) butter
1 onion, chopped
2 garlic cloves, chopped
1 cup (250 ml) apple, peeled and diced
1/2 tbsp (7 ml) curry powder
1 slice of bread, cut into cubes
Salt and freshly ground pepper
1 boneless turkey breast, about 2 lb (1 kg)
1 1/4 cups (310 ml) Canadian Gouda, diced
1 tbsp (15 ml) butter, melted

Cranberry sauce:
1 tbsp (15 ml) butter
2 cups (500 ml) fresh or frozen cranberries
1/4 cup (60 ml) sugar
1/2 cup (250 ml) chicken or beef broth
Salt and freshly ground pepper
 
 
And here is how you will bring it all together:
  1. Preheat oven to 425°F (220°C).
  2. In a skillet, melt butter on medium-high heat and cook onion, garlic and diced apple for 5 minutes.
  3. Remove from heat, add curry powder and bread cubes, and season. Mix well and let cool.
  4. Cut turkey breast in half through its thickness (without cutting through all the way, so as to be able to open it up like a book).
  5. Add Gouda to cooled apple and curry mixture.
  6. Spread bottom half of turkey breast with mixture, then close up the two halves and hold in place with toothpicks.
  7. Place in an oven-safe dish, brush top with melted butter, season and bake in oven for 15–20 minutes. Reduce heat to 350°F (180°C) and cook for 1 more hour.
  8. In a saucepan, melt butter and cook cranberries for 5 minutes.
  9. Add sugar and cook another 2 minutes, then deglaze with red wine and reduce by half.
  10. Add broth and leave cranberries on heat 7–10 minutes until cooked and the broth thickens. Season and serve with the stuffed turkey.
I would definitely like to try this recipe again and would appreciate any insight folks may have into how I can make the turkey juicer!
 
Bon appetite & enjoy!

Thursday, December 13, 2012

Cornmeal Halibut with Corn Salsa

Last year for Christmas I gave Steve a cookbook that is spin off product from the Men's Health magazine called "Cook This, Not That" and since he unwrapped it we have been cooking our way through the book. Some of the notable dishes we have made from it are:
One of the recipes that we had been eying up for some time now was that 'Cornmeal Catfish with Corn Salsa'. And as you can see from the title of this post, we chose to use halibut instead of catfish.

Here are all of the ingredients that you will need for this recipe:
  • 4 tsp canola oil
  • 1 ear corn, kernels removed from the cob (we just used a can of corn kernels)
  • 1 can (16oz) black beans, rinsed and drained
  • 1 avocado, pitted and cut into cubes
  • juice of one lime (plus wedges for garnish - optional)
  • 1 jalapeno, minced
  • salt and black pepper
  • 1 cup cornmeal
  • 1/8 tsp cayenne pepper
  • 4 catfish fillets (we just used 2 halibut fillets) 6oz each
And here is how we brought it all together:
  1.  Heat 1 teaspoon of the oil in a medium saucepan over medium-high heat. Add the corn kernels and cook, stirring occasionally, until they are lightly browned, about 5 minutes. Add the beans and warm through. Transfer to a bowl and stir in the avocado, lime juice, and jalapeno; season with salt and pepper.
  2. Pour the cornmeal onto a large plate; season with the cayenne, 1 teaspoon salt and 1/4 teaspoon black pepper. Dredge the fillets in the cornmeal until evenly coated.
  3. Heat the remaining 3 teaspoons of oil in a large nonstick skillet or saute pan over medium heat. When the oil is hot, add the catfish (or in our case the halibut) and cook for 4 to 5 minutes per side, until the coating is golden and crispy and the fish flakes easily. Serve the fish topped with the salsa along with additional lime wedges, if you like.
This dish was very tasty! It was our fish time using cornmeal as a coating and we loved the texture and added flavor it gave to the recipe. The salsa made a lot more than we had imagined but luckily it was so good and was used in many other dishes over the next few days.

Give this recipe a try when you are looking for a good crunchy fish dish with a Mexican flare!

Bon appetite & enjoy!

This recipe is from:
Cook This, Not That! - Kitchen Survival Guide
The No-Diet Weight Loss Solution
David Zinczenko & Matt Goulding
Rodale Inc. 2010
Page 244